Once the seedlings were ready to be hardened off, my husband and I spent a weekend building the raised bed and preparing the soil. First, we built the walls using barn wood from a old shed on our property; then, laid cardboard down to kill the grass underneath. Next, we layered mulch, organic compost, and organic raised bed mix to make the perfect bed. I'm so happy with how it turned out, and can't wait to grow winter vegetables for our rabbit to munch on!
I've shared before about my garden business, Sprouts with Clout, so it's not surprising that our home and yard are covered in plants. For a couple years I've tossed around the idea of building square foot gardens, but it's taken a back seat to our long list of other projects. Caring for house plants is easy to me, but vegetable gardening seemed more intimidating because it's a complete process from seed to fruition. Before we built the garden, I planted organic seeds in a seed starter tray. I picked six different varieties to start with and spent a few weeks tending to my veggie babies. The tray was perfect because I could move it around for optimal sunlight. Once the seedlings were ready to be hardened off, my husband and I spent a weekend building the raised bed and preparing the soil. First, we built the walls using barn wood from a old shed on our property; then, laid cardboard down to kill the grass underneath. Next, we layered mulch, organic compost, and organic raised bed mix to make the perfect bed. I'm so happy with how it turned out, and can't wait to grow winter vegetables for our rabbit to munch on! 
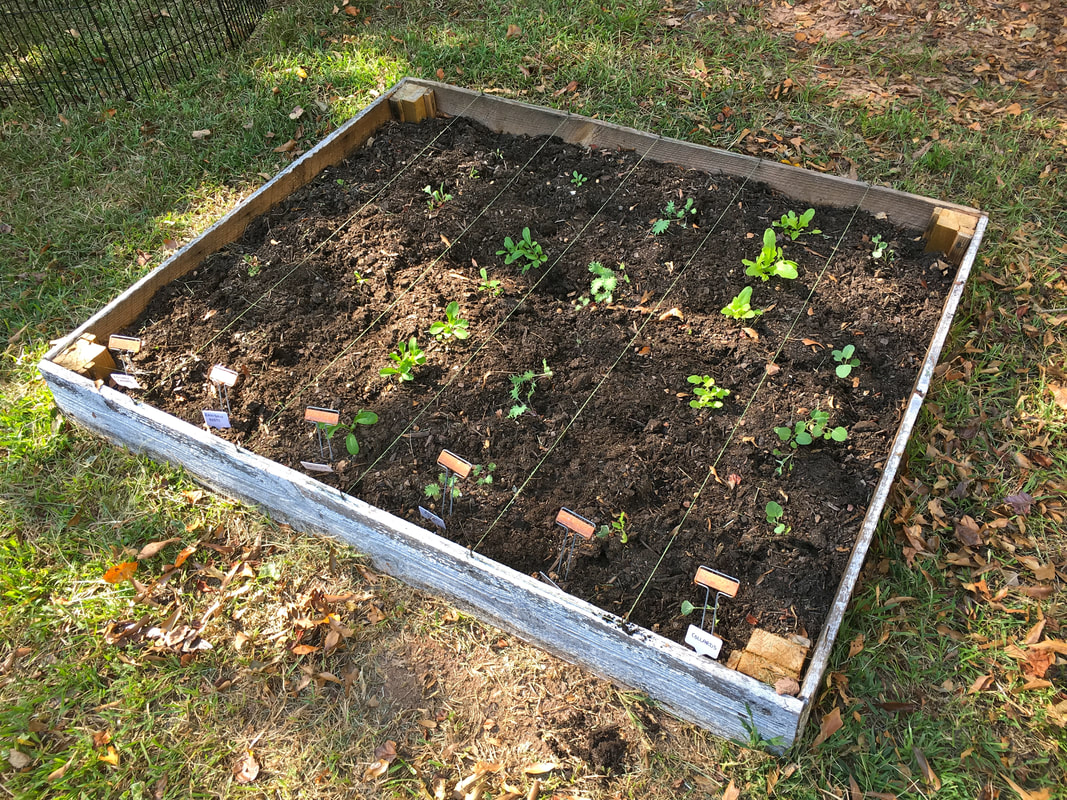
It's been almost three weeks since I transplanted the seedlings and they are growing quickly. We haven't had a drop of rain in weeks, but I water them every evening and inspect the plants for pests. So far, so good! I'll post another update in a couple months when they start producing enough to harvest.
0 Comments
When we removed the old potting shed from our back yard we salvaged some of the barn wood and this blue door. It has minimal termite damage compared to the rest of the shed, and is sturdy enough to eat off of. I've dreamed of turning it into a picnic table since last summer, and this weekend we finally got it done! All it took was some light sanding, removing the original hardware, and adding four legs. We debated on what to use for legs, but ultimately we went with deck posts which we cut down to 30". I painted them with a thin coat of white to keep it shabby chic, and that's it! So easy. The original turquoise paint has faded to the prettiest powder blue. I love how it compliments the navy color of our house, but I still need to seal the top to protect it from the weather. I pulled some chairs from the porch and dining room to add seating, and I'm confident we could squeeze eight adults around this picnic table. We're finishing up our outdoor patio space just in time for some festive summer gatherings! With the addition of this table we will be able to host our family and friends outdoors by the grill and enjoy this sunny weather.
Check out the before photos here ... Connor and I celebrated our first wedding anniversary on Monday, and we've been admiring all of our accomplishments around the house. The majority of our interior renovations have just been paint, fixtures, and furniture, but when it came to the exterior of our house we needed some contracted help. The first priority was a new roof. When we had the house inspected for closing a year ago, we had some concerns about the old roof. There was some discoloring and missing shingles, but since it wasn't leaking the owners weren't required to replace it. We've been patiently waiting for a little more storm damage to accrue, and by March we called several roofing companies to come out and estimate the replacement costs. After meeting with Freedom Roofing they suggested we call our insurance to file a claim. We were surprised to learn that Safeco would pay for the roof replacement on the main house and garage, as well as the new wood to nail the shingles to! We are so, so thankful for our roofers taking the time to meet with the insurance inspector and working so diligently to remove not one, but two layers of shingles and the original cedar shakes from 1926. I initially wanted a metal roof, but since we made an insurance claim we had to replace the roof with the same surface. We were, however, able to upgrade the composite shingles to architectural shingles and pay the difference out of pocket. Since my metal roof dreams were squashed, I decided to use white shingles to get a similar look. Connor took a tiny bit of convincing, but he trusts my fixer upper obsession and my final vision for our bungalow. As it turns out "Arctic White" architectural shingles are hard to come by in South Carolina, so we had to wait a week for a lot to be shipped to us. I really love how the roof turned out, and we've already noticed a difference in our power bill since switching to an energy efficient color. You'll also notice that we removed an addition off of our garage to open up our backyard. A few weeks later we removed the iron rails and aluminum awning from the front porch. We left the columns in tact so we could use them as a base for the new cedar columns. After searching Pinterest, I found a tutorial for wrapping old columns to create an updated look. You can read about it here. We custom ordered our 12" cedar boards from 84 Lumber, and it only took a couple hours to assemble them. I rolled on the stain and water sealer the next day to finish the look. I am so in love with them! They turned out even better than I expected, and it was so easy to do since we were just wrapping the existing columns. Finally, it was time to work on the siding. We laid out our options, and figured we could either paint the aluminum, restore the original wood siding underneath the aluminum, or replace it with vinyl or hardie board. After some investigating, we decided the most economical option was to paint the aluminum. I hired A1 Painting to pressure wash the house and garage, and paint the house. They use Sherwin WIlliams paints, so I picked the color Indigo Batik and fell in love with our bungalow all over again. 506 Fairview Street sure has come a long way in the last year! We have worked so hard to see our dreams become reality, and we really love how it has turned out. Some nights we just stand in the front yard and bask in how blessed we have been in our first year of marriage. This house has been such a growing experience for Connor and me, and believe it or not we would do it all over again!
|
Categories
All
AuthorDusti McCraw Archives
December 2022
|